Knowing how to properly lace roller skates is crucial for beginners. By learning how to lace up roller skates the right way, new skaters can stay comfortable and safe. We’ll cover various methods for how to lace roller skates for beginners so your feet remain supported once the wheels get rolling underfoot.
Table of Contents
- Prep Work Before You Lace Roller Skates
- Standard Methods for How to Lace Roller Skates
- Alternative Roller Skate Lacing Techniques
- Getting Proper Lace Tightness When You Tie Roller Skates
- Lacing the Toe Area
- Securing the Heels
- Inspecting and Replacing Worn Laces
- Finishing Touches When You Lace Up Roller Skates
Prep Work Before You Lace Roller Skates
Before learning how to tie roller skates, inspect that the skate boots fit properly. Sit down and slide your feet into the boots, loosely lacing them up. Walk around to identify any discomfort spots needing attention when you lace your roller skates tighter. If the skates are brand new, break them in gradually before tightening the laces fully for skating.
Sizing appropriate laces for your roller skates depends on the number of eyelets. Standard skate boots have between 10-20 eyelets threading all the way up. Size replacement laces according to this eyelet count:
- 10-12 eyelets: 48-54 inches
- 14-16 eyelets: 60-72 inches
- 18-20 eyelets: 72-84 inches
Choose replacement laces several inches longer than the eyelet count to permit knotting off at the top when you finish lacing up roller skates.
Standard Methods for How to Lace Roller Skates
There are three primary techniques for lacing roller skates:
Standard Criss-Cross Lacing
The basic method taught to most beginners. Starting at the bottom set of eyelets, lace ends crisscross between opposite eyelets working upwards. This evenly tensions the whole foot for basic recreational skating support. Ensure the crisscross remains straight up and down rather than angling across eyelet channels.
Derby Track Lacing
Popular for quad skate stability. Laces crisscross normally from bottom eyelets upwards. But near the top eyelets, both lace ends run tightly straight across horizontally to opposite sides rather than keep zig-zag crossing upwards. This locks the ankle and heel rigidly side-to-side.
Speed Skate Lacing
Used on high-performance speed skates. The lower boot eyelets get crisscrossed as usual first. But upper eyelets get skipped by lacing each side straight across horizontally to the opposite side, then run downward. Allows more forward ankle flexion without loosening.
Testing each main lacing technique can help identify your preference for comfort, control, and needed support. Mixing methods are also possible like speed lacing the uppers but derby style straight across only the very top ankles. Let your foot shape and skating style guide ideal lacing trials.
We also got you covered with this YouTube video by the Moxi Roller Skates channel:
Here is a summary of the video that can help you find the part you need:
00:44 Laces: Width, Length & Material
05:38 Most common way to lace up roller skates
09:07 How to lace up skates for bunion pain
12:24 How to lace roller skates for high arches
14:15 How to lace roller skates for heel slipping
16:39 How to lace roller skates for wide feet
Alternative Roller Skate Lacing Techniques
More advanced skaters use different ways for extra ankle support. Derby lacing, often seen on quad skates, locks ankles down better. It crisscrosses up from the bottom eyelets normally first. But near the top, both lace ends run horizontally straight across to opposite sides rather than keep crossing upwards.
Wide Vs Narrow Feet
For wide feet, consider skipping the bottom-most and top-most eyelets near toe caps and ankles. This helps reduce uncomfortable pressure and irritation over the widest areas of the foot. Threading the laces only through the central eyelets better distributes tension over the midfoot without squeezing sensitive toes or ankles.
We also made a complete guide that shows how to lace roller skates for wide feet.
Those with narrow feet may benefit from using all eyelets for a more custom, tight fit across the whole foot. Maximizing eyelet usage allows the laces to contour tightly against the narrow shape without gaps or looseness. You can also experiment with skipping side eyelets as needed only over specific pressure points along the feet.
Inline Skate Lacing
Speed lacing on high-performance inline skates also skips upper eyelets. After crisscrossing mid-boot, both laces pull tightly straight across horizontally before running downward for tying off. This allows more forward ankle flexing, unlike derby lacing’s strict side-to-side support.
Getting Proper Lace Tightness When You Tie Roller Skates
Regardless of chosen lacing techniques, appropriately snug skates are vital for control and injury avoidance. But lacing too tightly also hurts enjoyment and risks comfort. Use enough tensional force when you tie roller skates so feet stay anchored inside boots without slipping excessively when striding. Yet don’t eliminate all wiggle room or risk numbness.
To determine if laces are properly tight, do a “heel slip test” when laced and standing. Have a friend pull back on the top of the skate to simulate striding. If your heel lifts more than 1⁄4 inch out of the back of the boot, laces are too loose. Tighten further and retest. Some minor heel lift is normal but it shouldn’t fully leave the boot.
Also, assess lace tightness by walking around on your skate wheels before riding. Pay attention to any emerging hot spots or numbness, which signal localized lacing that’s too restrictive. Tap your feet around inside the boots – you should feel snug contact all the way around each foot without painful pressure points. Re-adjust laces whenever you lose normal foot sensations.
Lacing the Toe Area
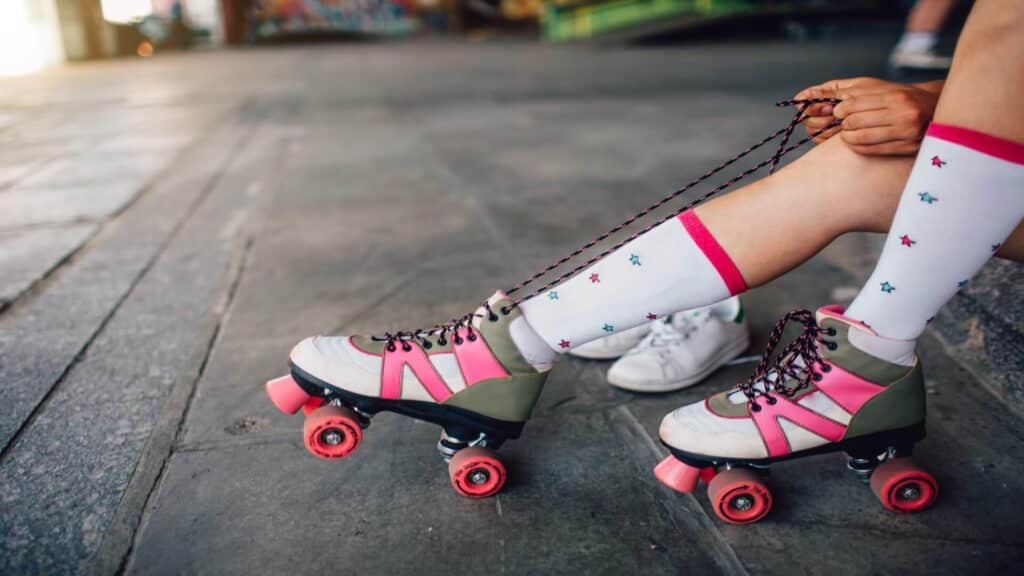
Pay special attention to lacing around the toe box, as this area tends to have significant impact and pressure while skating. Make sure to distribute tension across the metatarsal eyelets in the middle of the foot rather than solely pulling the outside lace paths tighter.
Consider threading the toe caps themselves to leverage the stiff structure protecting your toes – this helps anchor the front of the foot securely. Alternatively, some skip the lowest 1-2 eyelets at toe caps for comfort, preventing rubbing or irritation. Adjust toe lace tightness until no major pressure points emerge across the ball of your foot.
Securing the Heels
Heel slippage risks injury by allowing feet to involuntarily slide on slick skating surfaces. Prioritize proper lace tensioning further up the ankle and around the heels. Focus on straightening up any diagonal lace paths crossing the heels vertically to keep this area tighter.
Some methods also incorporate a “heel lock” by crisscrossing the top two eyelets closest to the heel so laces dig in and prevent lift. Wrapping laces once fully around the heel exterior can also enhance stability before tying off. If using speed laces, cinch down the horizontal heel passage aggressively and consider adding extra knotting for redundancy. Assess heel security with forward-leaning ankle flex test motions.
Inspecting and Replacing Worn Laces
Check your roller skate laces periodically for fraying and damage, especially if skating frequently outdoors on rough pavement rather than indoor rinks. Frayed areas indicate threads tearing from friction and tension, risking unexpected snapping mid-skate.
Look for thinning or stretchiness of the lace material itself – healthy laces remain thick and gently rigid. Also inspect where laces contact and rub on metal eyelet holes, a prime deterioration area. Twisting and sharply bending laces reveal stiff versus limp interior health too.
Replace roller skate laces at least every 3-6 months for casual recreational skaters. More aggressive skaters may require new laces every 1-2 months from the grueling demands of jumps, tricks, and competition routines. Always have extra backup laces on hand before existing pairs become too hazardously frayed from the demands of your skill level.
Finishing Touches When You Lace Up Roller Skates
Securely tie roller skates using double overhand knots for redundancy. Check finished knots by sharply lifting ankles upwards – properly tied laces shouldn’t loosen. Consider wrapping excess lace length to prevent tripping rather than leaving long bow loops.
With practice, you’ll learn how to lace roller skates optimally for your feet and skating style. The proper lacing technique allows transferring power safely into wheel motion without foot slippage or loss of stability. So take the time to experiment with different methods for how to lace up roller skates and how to tie roller skates for your best experience.


